In order for your device to receive push notifications you will need to receive a registration ID from the remote push service be it Google Cloud Messaging (GCM), Firebase Cloud Messaging (FCM) or Apple Push Notification Service (APNS). We’ll learn how to register for push and report that registration ID back to our application server.
Initialize the PushNotification plugin and register an event handler for a registration event. Open the www/js/my-app.js file
and add the following function to the end of the file:
 function setupPush() {
   var push = PushNotification.init({
       "android": {
           "senderID": "XXXXXXXX"
       },
       "browser": {},
       "ios": {
         "sound": true,
         "alert": true,
         "badge": true
       },
       "windows": {}
   });

   push.on('registration', function(data) {
       console.log("registration event: " + data.registrationId);
       var oldRegId = localStorage.getItem('registrationId');
       if (oldRegId !== data.registrationId) {
           // Save new registration ID
           localStorage.setItem('registrationId', data.registrationId);
           // Post registrationId to your app server as the value has changed
       }
   });

   push.on('error', function(e) {
       console.log("push error = " + e.message);
   });
 }
You may be wondering why we are checking the registration ID against one we saved in local storage. Basically, Apple or Google may refresh your registration ID so it always pays to see if the ID has changed. You can use this opportunity to remove an old ID from your app server and add the new ID.
Next in the www/js/my-app.js file, find the deviceready handling section and modify it so it calls our setupPush method.
 $$(document).on('deviceready', function deviceIsReady() {
   console.log('Device is ready!');
   setupPush();
 });
Next refresh the application by using the four finger tap gesture. Once your app reloads, if this is the first time you are requesting the ability to receive push notifications on iOS you will see the following dialog. Please click the OK button.
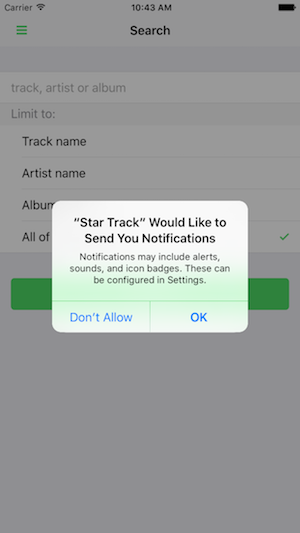
If you are running on Android or have already given permission to the app to use push notifications then you will not see this dialog.
Finally, you will see the registration ID in your terminal session.
[phonegap] [console.log] registration event: APA91bE1MmeTc92igNoi5OkDWUV
Obviously, your registration ID will be different but you get the picture.
$ phonegap plugin add phonegap-plugin-push --variable SENDER_ID=XXXXXXXX
You won’t need to specifically add it for this workshop as it is already included in the PhoneGap Developer App. If you are creating the project from scratch and using the CLI locally then use the command above.